The refresh rate of a display plays a crucial role in delivering a smooth and seamless visual experience. Whether you’re a professional video editor or a regular user who enjoys crisp visuals, understanding how to optimize the refresh rate on your MacBook Pro display is essential. In this comprehensive guide, we will explore the steps to change the refresh rate on your MacBook Pro, discuss the benefits of different refresh rates, and provide valuable tips to enhance your overall viewing experience.
Before diving into the process of changing the refresh rate on your MacBook Pro display, let’s take a moment to understand what refresh rate means. The refresh rate refers to the number of times your display refreshes the image it displays per second. It is measured in Hertz (Hz). A higher refresh rate results in smoother motion and reduces motion blur, making it particularly important for tasks such as video editing, gaming, and watching fast-paced content.
The Importance of Refresh Rate for MacBook Pro Users
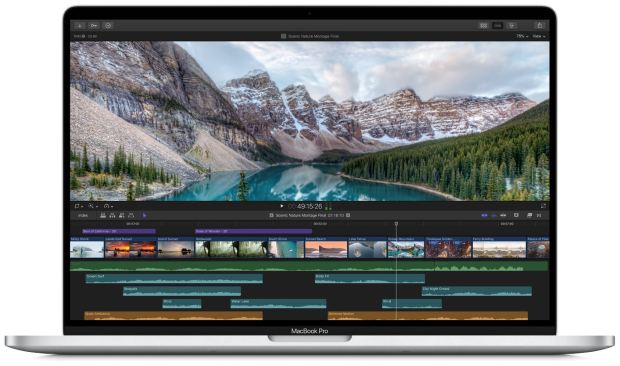
When Apple introduced its 2021 MacBook Pro models, it included one of the best laptop displays ever seen – the Liquid Retina XDR display. This display offers higher performance modes and customization options, including the ProMotion feature. ProMotion is Apple’s adaptive refresh rate technology, which dynamically adjusts the display’s refresh rate to match the content being viewed. This results in a more fluid and responsive visual experience.
The default refresh rate for most displays, including the MacBook Pro, is typically set to 60Hz. While this is suitable for most users, professionals working with video editing or other visually demanding tasks may benefit from adjusting the refresh rate to match their specific needs. Changing the refresh rate on your MacBook Pro allows you to optimize the display’s performance, ensuring that you get the most out of your device.
Steps to Change the Refresh Rate on MacBook Pro Display
Now that we understand the significance of the refresh rate and its impact on the viewing experience, let’s delve into the steps to change the refresh rate on your MacBook Pro display. Please note that not all Mac displays can change their refresh rate, so it’s essential to check whether your specific model supports this feature.
Step 1: Access System Preferences
To begin, click on the Apple symbol in the menu bar and select “System Preferences” from the dropdown menu. This will open the System Preferences window, where you can customize various settings on your MacBook Pro.
Step 2: Navigate to the Display Settings
In the System Preferences window, locate and click on the “Displays” icon. This will take you to the display settings, where you can adjust various parameters related to your MacBook Pro’s display.
Step 3: Explore Refresh Rate Options
Under the “Display” tab, you will find a button labeled “Scaled.” Hold down the OPTION key on your keyboard and click on the “Scaled” button. This will reveal the available refresh rate options for your MacBook Pro display.
Step 4: Choose the Desired Refresh Rate
In the refresh rate dropdown menu, you will see a list of available options. The specific refresh rate options will depend on your MacBook Pro model and the connected display. Select the refresh rate that best suits your needs by clicking on it.
Step 5: Confirm and Apply Changes
After selecting the desired refresh rate, close the System Preferences window. Your MacBook Pro display will now operate at the chosen refresh rate. You can always return to the display settings to adjust the refresh rate as needed.
Optimizing Refresh Rate for External Mac Displays
In addition to changing the refresh rate on your MacBook Pro’s built-in display, you can also optimize the refresh rate for external displays. This is particularly useful if you connect your MacBook Pro to an external monitor or projector for extended work or entertainment purposes.
Step 1: Connect the External Display
Ensure that the external display is properly connected to your MacBook Pro. Use the appropriate cables or adapters to establish a reliable connection between the two devices.
Step 2: Access System Preferences
Click on the Apple symbol in the menu bar and select “System Preferences” from the dropdown menu. This will open the System Preferences window, where you can customize various settings on your MacBook Pro.
Step 3: Navigate to the Display Settings
In the System Preferences window, locate and click on the “Displays” icon. This will take you to the display settings, where you can adjust various parameters related to your MacBook Pro’s display.
Step 4: Explore Refresh Rate Options for External Display
Under the “Display” tab, hold down the OPTION key on your keyboard and click on the “Scaled” button. This will reveal the available refresh rate options for the connected external display.
Step 5: Select the Desired Refresh Rate
Choose the appropriate refresh rate for the external display by selecting the corresponding option from the refresh rate dropdown menu. Click on the desired refresh rate to apply the changes.
Step 6: Confirm and Apply Changes
After selecting the desired refresh rate, close the System Preferences window. Your external display will now operate at the chosen refresh rate, providing you with an optimized visual experience.
Benefits of Different Refresh Rates
When changing the refresh rate on your MacBook Pro display, it’s important to understand the benefits that different refresh rates offer. While the default refresh rate of 60Hz is suitable for most users, there are specific scenarios where adjusting the refresh rate can significantly enhance your viewing and editing experience.
ProMotion: The Adaptive Refresh Rate
For MacBook Pro models equipped with the Liquid Retina XDR display, such as the latest 16-inch model, ProMotion is a notable feature. ProMotion is an adaptive refresh rate technology that dynamically adjusts the display’s refresh rate based on the content being viewed. This means that the display can switch between 47.95Hz, 48Hz, 50Hz, 59.94Hz, and 60Hz, providing a smoother and more responsive visual experience.
Video Editing and Content Creation
If you’re a professional video editor, adjusting the refresh rate of your MacBook Pro display can be particularly beneficial. Matching the refresh rate to the frame rate of your video content ensures accurate playback and editing. For example, if you’re working on content with a frame rate of 30 frames per second (fps), setting your display to a refresh rate of 60Hz allows each frame to be displayed twice, resulting in smoother playback and better editing precision.
Gaming and Fast-Paced Content
Gamers and enthusiasts who enjoy fast-paced content can also benefit from higher refresh rates. A higher refresh rate, such as 120Hz, reduces motion blur and enhances the overall gaming experience, providing a competitive edge in fast-action games. If you’re an avid gamer, consider adjusting the refresh rate on your MacBook Pro display to match the capabilities of your game and hardware.
Tips for Optimizing Your Viewing Experience
Now that you have a better understanding of how to change the refresh rate on your MacBook Pro display and the benefits it offers, let’s explore some additional tips to optimize your viewing experience further.
Match Refresh Rate with Content
It’s essential to match the refresh rate of your MacBook Pro display with the content you’re viewing or editing. As a general rule of thumb, choose a refresh rate that is twice the frame rate of your video content. This ensures smooth playback and precise editing control.
Use Native Screen Resolution
Alongside adjusting the refresh rate, it’s crucial to use the native screen resolution for your MacBook Pro display. Native resolution ensures optimal image quality and maintains the intended aspect ratio for your content.
Calibrate Display Colors
For accurate color representation, consider calibrating your MacBook Pro display. Calibration helps ensure that the colors you see on the screen match the original content, making it essential for tasks such as graphic design, photo editing, and video production.
Adjust Brightness and Contrast
Experiment with the brightness and contrast settings on your MacBook Pro display to find the optimal balance for your environment and viewing preferences. Adjusting these settings can enhance visibility and reduce eye strain during extended use.
Consider Ambient Lighting
Take into account the ambient lighting conditions when using your MacBook Pro display. Adjust the display’s brightness accordingly to optimize visibility and reduce eye fatigue. Dimming the display in low-light environments or using Night Shift mode can also help mitigate blue light exposure.
Regularly Update macOS and Apps
Keeping your macOS and applications up to date is crucial for optimal performance and compatibility with different display settings. Updates often include bug fixes, performance improvements, and new features that can enhance your overall viewing experience.
Conclusion
Optimizing the refresh rate on your MacBook Pro display is a simple yet powerful way to enhance your viewing and editing experience. By adjusting the refresh rate to match your specific needs, you can enjoy smoother motion, reduced motion blur, and improved precision in tasks such as video editing, gaming, and content creation. Remember to choose a refresh rate that complements your content and hardware capabilities. Implement these optimization tips, and you’ll be well on your way to unlocking the full potential of your MacBook Pro display.
Remember, for any further assistance or troubleshooting, consult Apple’s official documentation or reach out to their support team. Happy optimizing!
Experiencing difficulties with your Device, check out our “How To” page on how to resolve some of these issue


