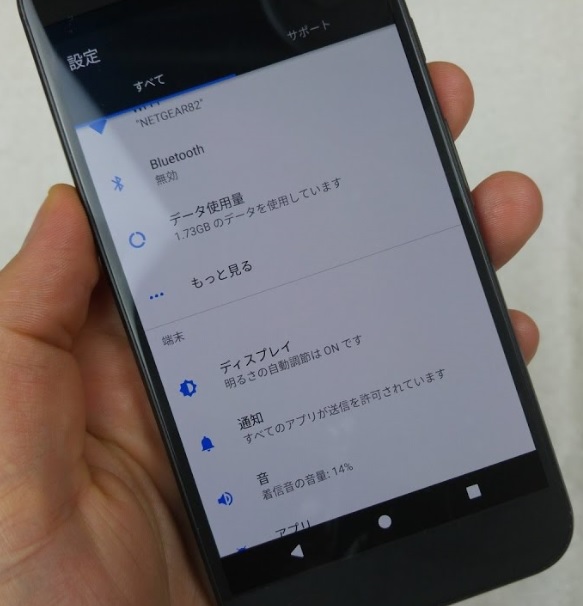
If you’re an Android smartphone user, you may have encountered the frustrating issue of your device displaying a “No Service” or “No Signal” message. This problem can occur across various brands and carriers, leaving you unable to connect to your cellular network or access cellular data. But fear not! In this comprehensive guide, we’ll explore the common causes of this issue and provide actionable solutions to help you fix it.
Experiencing the “No Service” or “No Signal” message on your Android smartphone can be highly frustrating. It can disrupt your communication, prevent you from accessing data, and leave you feeling disconnected. Fortunately, there are several potential solutions to this problem, and we’ll guide you through each one.
In the following sections, we’ll delve into the reasons why your Android device may be displaying the “No Service” message and explore various troubleshooting steps to help you resolve the issue. From simple fixes like restarting your phone to more advanced solutions like manually selecting your carrier, we’ll cover it all.
Reasons Why Your Android Says ‘No Service’
There are several common causes for your Android smartphone to display the “No Service” message. Understanding these reasons can help you identify the root cause of the issue and apply the appropriate solution. Here are some possible reasons:
- SIM Card Issues: A faulty or improperly inserted SIM card can lead to a loss of network connectivity.
- Network Operator Problems: Temporary outages or maintenance work by your network operator can result in the “No Service” message.
- Software Glitches: Minor software issues within your Android device’s operating system can cause network problems.
- Firmware Compatibility: Incompatibility between your device’s firmware and the network carrier’s infrastructure can lead to connectivity issues.
- Network Coverage: Weak network coverage in your area or being in a location where the network signal is obstructed can result in the “No Service” message.
- Hardware Problems: Physical damage to your phone’s antenna or other hardware components can cause network connectivity problems.
- Carrier Restrictions: In some cases, carriers may restrict network access due to unpaid bills, contract violations, or other reasons.
Quick Fixes to Try First
Before diving into more advanced troubleshooting steps, it’s always worth trying some quick fixes that may resolve the “No Service” issue on your Android device. These initial steps are easy to perform and often resolve the problem without further intervention. Here are some quick fixes to try:
Restart Your Phone
One of the simplest and most effective troubleshooting steps is to restart your Android device. This can help resolve temporary software glitches or network connection issues. To restart your phone, follow these steps:
- Press and hold the power button until a prompt appears on the screen.
- Select the option to restart your phone and wait for the device to power down and then boot up again.
Toggle Airplane Mode
Enabling and disabling Airplane Mode on your Android device can help reset the network connection, potentially resolving the “No Service” issue. Here’s how you can do it:
- Swipe down from the top of your screen to open the notification shade.
- Locate the Airplane Mode icon and tap on it to enable Airplane Mode.
- Wait for a few seconds, then tap the Airplane Mode icon again to disable it.
Check Wi-Fi Connection
Sometimes, your Android device may prioritize Wi-Fi connectivity over cellular network connectivity, leading to the “No Service” message. Ensure that your Wi-Fi is turned off and check if your device can connect to the cellular network. Here’s how you can check your Wi-Fi connection:
- Open the Settings app on your Android device.
- Select Wi-Fi and make sure the Wi-Fi toggle is turned off.
- Check if your device now shows a cellular network connection.
Update Your Device’s Software
Outdated software can sometimes result in network connectivity issues on Android devices. It’s essential to keep your device’s software up to date to ensure optimal performance. Here’s how you can check for software updates:
- Open the Settings app on your Android device.
- Scroll down and select About phone or About device.
- Look for a Software Update or System Update option and select it.
- If an update is available, follow the on-screen instructions to download and install it.
By following these quick fixes, you may be able to resolve the “No Service” issue on your Android device. If the problem persists, don’t worry. There are more advanced solutions that we’ll explore in the next section.
Advanced Solutions for No Service Issue
If the quick fixes didn’t resolve the “No Service” issue on your Android device, it’s time to try some more advanced solutions. These steps require a bit more technical knowledge and may involve adjusting various settings on your device. Here are some advanced solutions to consider:
Manually Select Your Carrier
In some cases, your Android device may have trouble automatically selecting the correct network operator. By manually selecting your carrier, you can ensure that your device connects to the appropriate network. Here’s how you can do it:
- Open the Settings app on your Android device.
- Select Network & Internet or Cellular Networks, depending on your device.
- Look for an option called Network Operators or Choose Network Operator and select it.
- Your device will scan for available networks. Once the scan is complete, select your preferred network operator from the list.
By manually selecting your carrier, you can bypass any potential issues with automatic network selection and establish a stable connection.
Re-Insert Your SIM Card
A loose or improperly inserted SIM card can cause network connectivity problems on your Android device. By re-inserting the SIM card, you can ensure that it is properly seated in its slot and establish a reliable connection. Here’s how you can re-insert your SIM card:
- Power off your Android device.
- Locate the SIM card tray, usually found on the side or top of your device.
- Use the SIM eject tool or a paperclip to eject the SIM card tray.
- Carefully remove the SIM card from the tray.
- Inspect the SIM card for any signs of damage or dirt. Clean it if necessary.
- Re-insert the SIM card into the tray, ensuring that it is properly aligned.
- Gently push the tray back into the device until it clicks into place.
- Power on your device and check if the “No Service” issue is resolved.
By re-inserting your SIM card correctly, you can eliminate any potential issues related to its connectivity.
Check for Network Operator Settings
Some Android devices allow you to adjust specific network operator settings manually. By accessing these settings, you can fine-tune your device’s network connection and potentially resolve the “No Service” issue. Here’s how you can check for network operator settings:
- Open the Settings app on your Android device.
- Select Network & Internet or Cellular Networks, depending on your device.
- Look for an option called Network Operators or Choose Network Operator and select it.
- Depending on your device, you may have different options available within this menu.
- Experiment with different settings, such as network mode or preferred network type, to see if it improves your network connectivity.
Keep in mind that the available options may vary depending on your device and carrier.
Reset Network Settings
Resetting your device’s network settings can often resolve network connectivity issues, including the “No Service” problem. This step will erase your saved Wi-Fi networks, Bluetooth pairings, and other network-related settings, so be prepared to set them up again. Here’s how you can reset your network settings:
- Open the Settings app on your Android device.
- Select System or General Management, depending on your device.
- Look for an option called Reset or Reset Options and select it.
- Choose the option to Reset Network Settings or Reset Wi-Fi, Mobile & Bluetooth.
- Confirm your selection and wait for your device to reset its network settings.
- Once the process is complete, set up your Wi-Fi network and other network-related settings again.
By resetting your network settings, you can eliminate any misconfigurations that may be causing the “No Service” issue.
Verify IMEI and ESN
IMEI (International Mobile Equipment Identity) and ESN (Electronic Serial Number) are unique identifiers assigned to each mobile device. A mismatch or issue with these identifiers can cause network connectivity problems. Here’s how you can verify your IMEI and ESN:
- Open the Phone or Dialer app on your Android device.
- Dial *#06# to display your device’s IMEI or ESN on the screen.
- Verify that the displayed IMEI or ESN matches the one printed on your device or its packaging.
- If the IMEI or ESN does not match or is not displayed, contact your carrier or device manufacturer for further assistance.
Verifying your IMEI and ESN can help identify any potential issues related to your device’s unique identifiers.
By following these advanced solutions, you have a higher chance of resolving the “No Service” issue on your Android device. However, if the problem still persists, there are additional troubleshooting steps to consider for specific scenarios.
Troubleshooting Specific Scenarios
The “No Service” issue on your Android device can manifest in various scenarios. Understanding the factors that contribute to these scenarios can help you apply more targeted solutions. Let’s explore some specific scenarios and their corresponding troubleshooting steps:
No Service While Roaming
If you encounter the “No Service” issue while roaming, it’s essential to ensure that your device is properly configured for roaming. Here’s what you can do:
- Open the Settings app on your Android device.
- Select Network & Internet or Cellular Networks, depending on your device.
- Look for an option called Roaming or Data Roaming and ensure it is enabled.
- If the issue persists, contact your carrier to verify that roaming is activated on your account and that your device is properly provisioned for roaming.
No Service After Android Update
Sometimes, updating your Android device’s software can inadvertently cause network connectivity issues. If you experience the “No Service” problem after a recent software update, try the following steps:
- Restart your device.
- Check for any available software updates and install them.
- Reset your network settings.
- Contact your carrier for assistance if the problem persists.
No Service After Dropping Your Phone
If your Android device experienced a physical impact, such as dropping it, the “No Service” issue may be related to hardware damage. In such cases, it’s recommended to visit an authorized service center for further evaluation and repair.
No Service in Specific Locations
Network coverage can vary depending on your location. If you consistently experience the “No Service” issue in specific areas, it may indicate a weak network signal or poor coverage. Consider the following steps:
- Move to a different location to see if the “No Service” issue persists.
- Contact your carrier to inquire about network coverage in the affected area.
- Consider using Wi-Fi calling or a network extender to improve connectivity in areas with weak signals.
By troubleshooting specific scenarios, you can tailor your solutions to the unique circumstances surrounding the “No Service” issue on your Android device.
Additional Tips to Improve Signal Strength
In addition to the troubleshooting steps mentioned above, there are several tips you can follow to improve the overall signal strength and network connectivity on your Android device. These tips can help prevent future occurrences of the “No Service” problem. Here are some additional tips:
Ensure Adequate Network Coverage
Before purchasing or using an Android device, it’s crucial to ensure that your area has adequate network coverage from your chosen carrier. Check the coverage maps provided by your carrier to verify signal strength in your location.
Use Wi-Fi Calling
If you have a stable Wi-Fi connection, consider using Wi-Fi calling as an alternative to cellular network calling. Wi-Fi calling allows you to make and receive calls over a Wi-Fi connection, bypassing any potential network issues.
Install Signal Booster Apps
Signal booster apps can help optimize your device’s signal reception by adjusting network settings and signal parameters. Explore reputable signal booster apps from the Google Play Store and install one that suits your needs.
Consider a Network Extender
If you consistently experience weak signals in specific areas, consider investing in a network extender or signal booster device. These devices amplify the network signal, providing improved coverage in your home or office.
By implementing these additional tips, you can enhance your Android device’s signal strength and potentially prevent future occurrences of the “No Service” issue.
Seek Professional Help
If you’ve exhausted all the troubleshooting steps and the “No Service” issue still persists on your Android device, it may be time to seek professional help. Here are two options to consider:
Contact Your Carrier
Reach out to your network carrier’s customer support for assistance. They can troubleshoot the issue from their end, check for any network outages or provisioning errors, and provide further guidance.
Visit an Authorized Service Center
If your device is still under warranty or you suspect a hardware-related issue, visit an authorized service center for a thorough evaluation and potential repair. Certified technicians can diagnose and resolve complex problems that require specialized expertise.
Remember to backup your data before visiting a service center to avoid potential data loss during the repair process.
Prevention Tips for Future No Service Issues
Prevention is always better than cure. By following some simple tips, you can minimize the chances of encountering the “No Service” issue on your Android device in the future. Here are some prevention tips:
Keep Your Device Updated
Regularly update your Android device’s software to ensure you have the latest bug fixes and improvements. Software updates often include network-related enhancements that can improve overall network connectivity.
Handle SIM Card Carefully
Take care when inserting, removing, or handling your SIM card. Improper handling can damage the SIM card or its slot, leading to network connectivity issues. Always follow the manufacturer’s instructions and use the appropriate tools for handling SIM cards.
Avoid Unauthorized Modifications
Avoid unauthorized modifications to your Android device’s software, such as rooting or installing custom ROMs. These modifications can disrupt the device’s network functionality, leading to network-related issues.
Conclusion
Experiencing the “No Service” issue on your Android device can be frustrating, but with the right knowledge and troubleshooting steps, you can resolve the problem. In this comprehensive guide, we’ve explored the common causes of this issue and provided actionable solutions to help you fix it.
Remember to start with quick fixes like restarting your phone or toggling Airplane Mode. If those don’t work, try more advanced solutions like manually selecting your carrier or re-inserting your SIM card. Troubleshoot specific scenarios and consider additional tips to improve signal strength.
If all else fails, seek professional help from your carrier or an authorized service center. By following prevention tips, you can minimize the chances of encountering the “No Service” issue in the future.
Stay connected and enjoy uninterrupted network connectivity on your Android device!
Experiencing difficulties with your Android Device, check out our “How To” page on how to resolve some of these issues.
Other Android Technical Reviews:- Android


